

Li Li
February 14, 2025
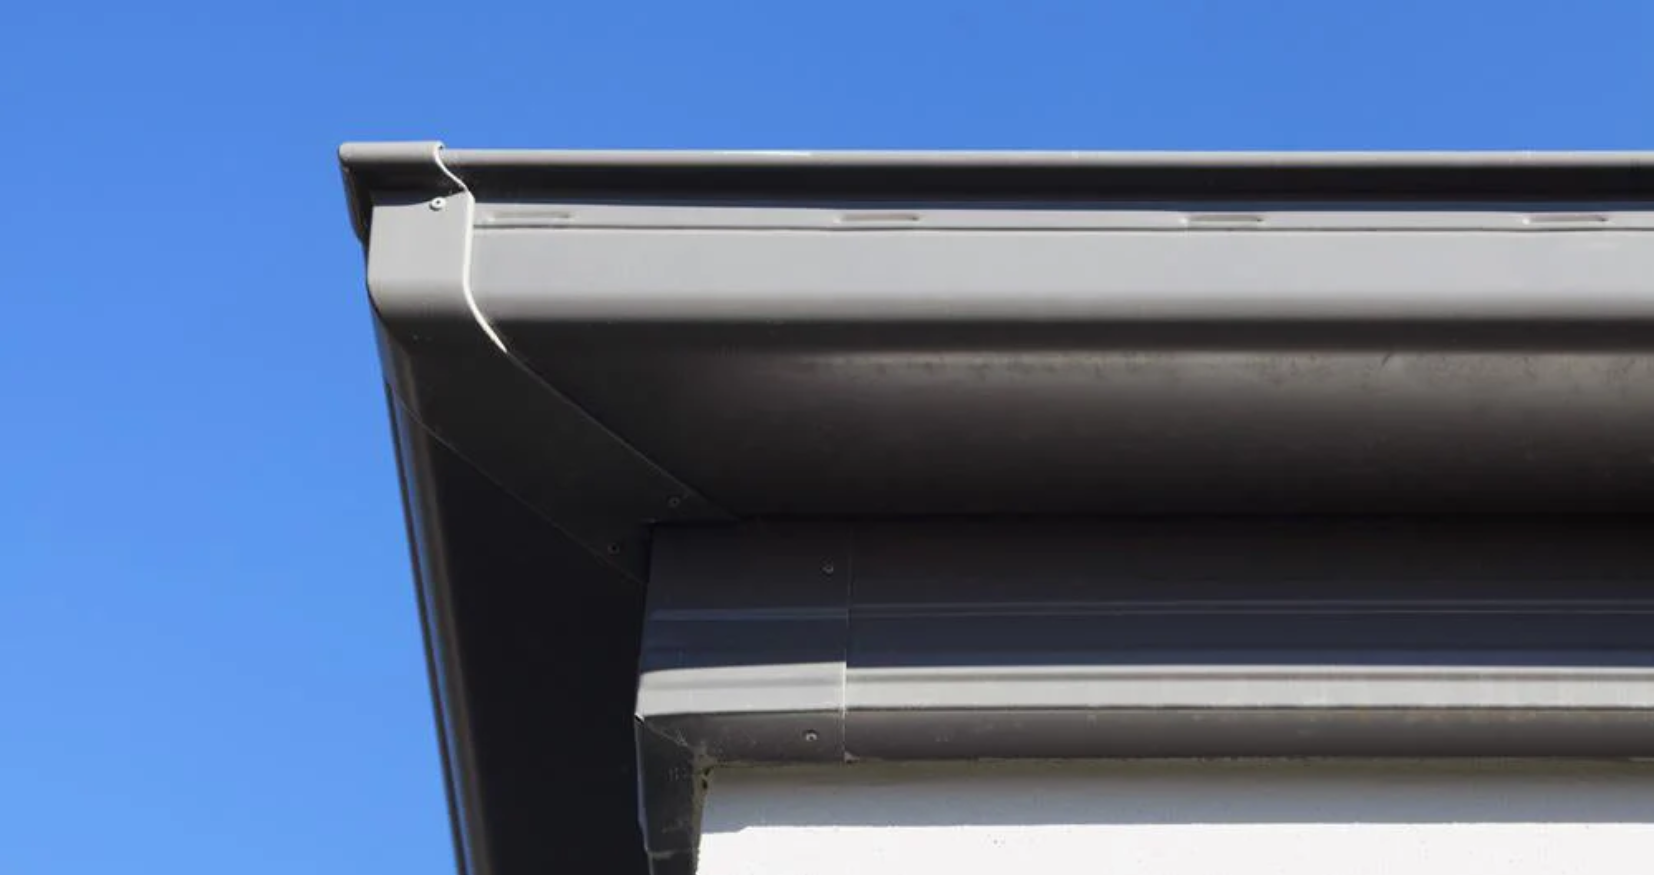
Guide to Installing a Gutter System for EPS Pergola
If you're planning to build a pergola with an insulated EPS roof panel and want to ensure that water doesn’t leak from the connection between the panels and the gutter, check out our installation guide below!
Guide to Installing an Overhang Gutter System
Installation Steps
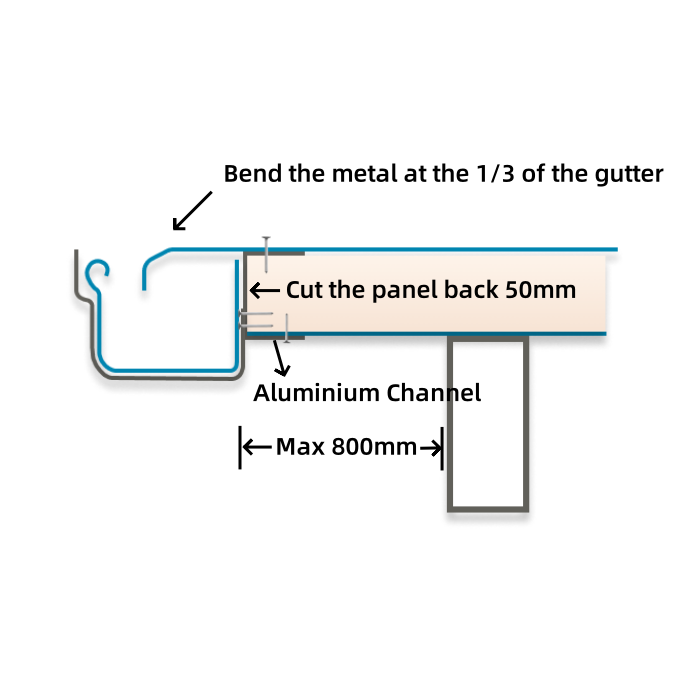
1.Cut the Ceiling Side Metal and Foam Cut back the ceiling side metal and foam on the panel by about 50mm. 2.Fix the U-Channel Insert the U-channel between the roof side metal and the foam. Secure it firmly with screws from both the top and bottom. 3.Install the Gutter Hooks Nail the gutter hooks onto the U-channel at 1-meter intervals. 4.Place the Gutter Carefully place the gutter onto the hooks. 5.Bend the Steel Sheet Bend the roof side metal sheet downward at about 1/3 of the gutter’s width to create a slope, allowing water to flow smoothly into the gutter.Why Choose the Overhang Style?
✅ The Bighands Building EPS Panels are capable of overlapping up to approximately 800mm, ensuring a secure and stable connection. ✅ Enhanced Protection: The overhang design provides additional coverage, shielding your pergola and outdoor space from rain, sun, and debris. ✅ Improved Shade: Extends the shaded area, creating a more comfortable outdoor environment for relaxation or entertainment. ✅ Architectural Appeal: Adds a visually striking element to your pergola, enhancing its overall design and aesthetic value. ✅ Versatile Functionality: Perfect for integrating with lighting and fans, offering both practicality and beauty. ✅ Durable Performance: The overhang structure is designed to withstand weather elements, ensuring long-lasting durability and stability.Guide to Installing a No-Overhang Gutter System
Installation Steps
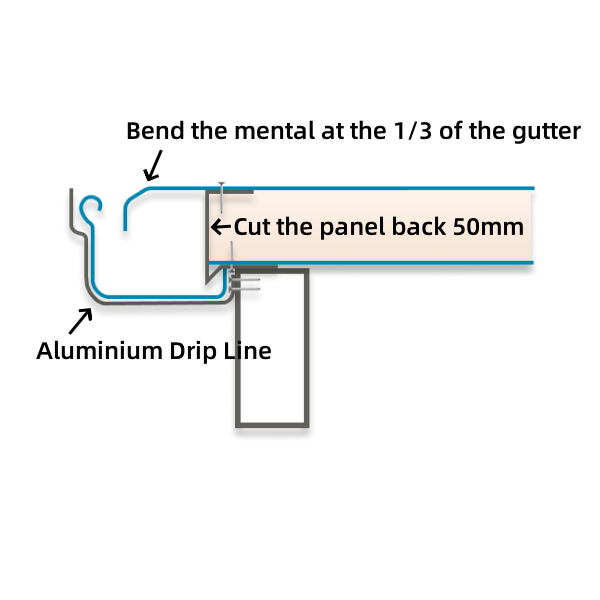
1.Choose the Right Accessories Use Bighands Drip Line, specially designed for panel structures, to ensure a perfect fit and smooth drainage. 2.Cut the Ceiling Side Metal and Foam Trim approximately 50mm from the ceiling side metal and foam backing to create space for the drip line installation. 3.Install the Drip Line Insert the drip line into the roof side metal, making sure it fully wraps around the foam for waterproofing and protection. 4.Secure the Gutter Brackets Nail the gutter hooks onto the U-channel at 1-meter intervals. 5.Place the Gutter Position the gutter into the brackets and adjust it to align seamlessly with the drip line. 6.Adjust the Roof Sheet Angle Bend the roof sheet downward at a one-third point of the gutter to create a natural slope, allowing water to flow smoothly into the gutter and preventing pooling.Why Choose the No-Overhang Style?
✅ Space-Saving: Ideal for pergolas without overhangs, maximizing the use of column edge space. ✅ Efficient Drainage: The combination of drip line and gutter ensures rainwater is quickly diverted, protecting the pergola structure. ✅ Aesthetic and Functional: The installation is neat and visually appealing, complementing the overall design of the pergola.
Related Articles

bhbadmin
February 15, 2022
Polycarbonate in Home Design
Polycarbonate is a thermoplastic polymer is lightweight, strong and cost-efficient. It is also versatile, offering
different grades of translucence (or light transmission) as well as heat transmission.

The contemporary look of the material has made it popular in the last few years in award winning architectural projects, especially in Europe.
Here, we share some of our favourite projects which have used polycarbonate in a stylish and clever way.
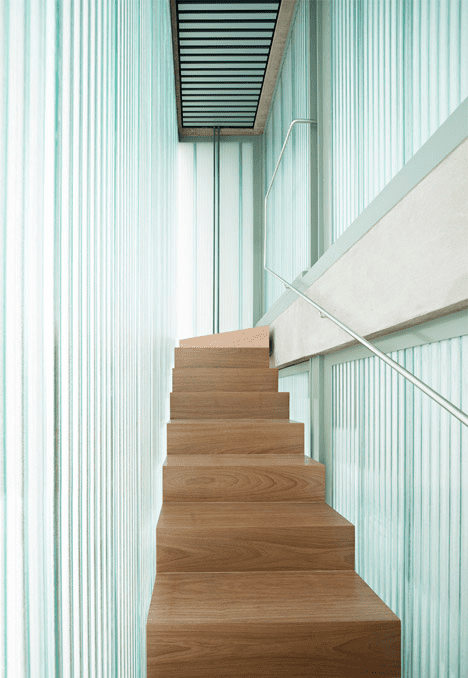
1. In what would have otherwise been a narrow staircase, Muka
Arquitectura’s
use of
polycarbonate panels turns this into an area filled with soft, diffused light and completely
transforming the space. It also creates a modern, minimalistic look, with the pale blue
polycarbonate sheeting balancing the warmth of the timber stairs.
2. Designed by Garces- De Seta- Bonet Architects, polycarbonate
sheeting is
used as both wall
and a section of roof to connect a living area and a workshop to create a sun-soaked
space. The
polycarbonate sheeting also retains the light and airy feel created by the white walls
and
stairs of the hybrid indoor-outdoor area.
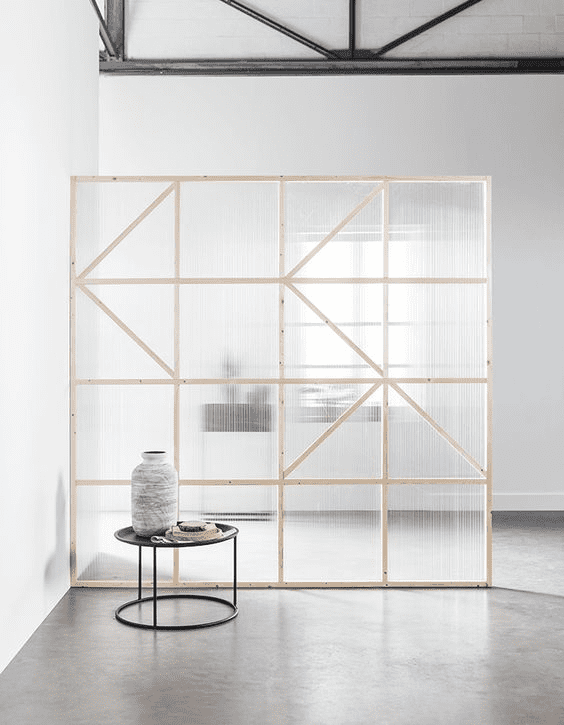
3. We love the concept of this Japanese inspired moveable
room
divider
which
uses natural wood
and polycarbonate sheeting to create a light and airy effect. It effectively divides
the
space
without making it look and feel smaller, and utilises the timber planks to create a
unique,
minimalistic design to create an interesting backdrop.
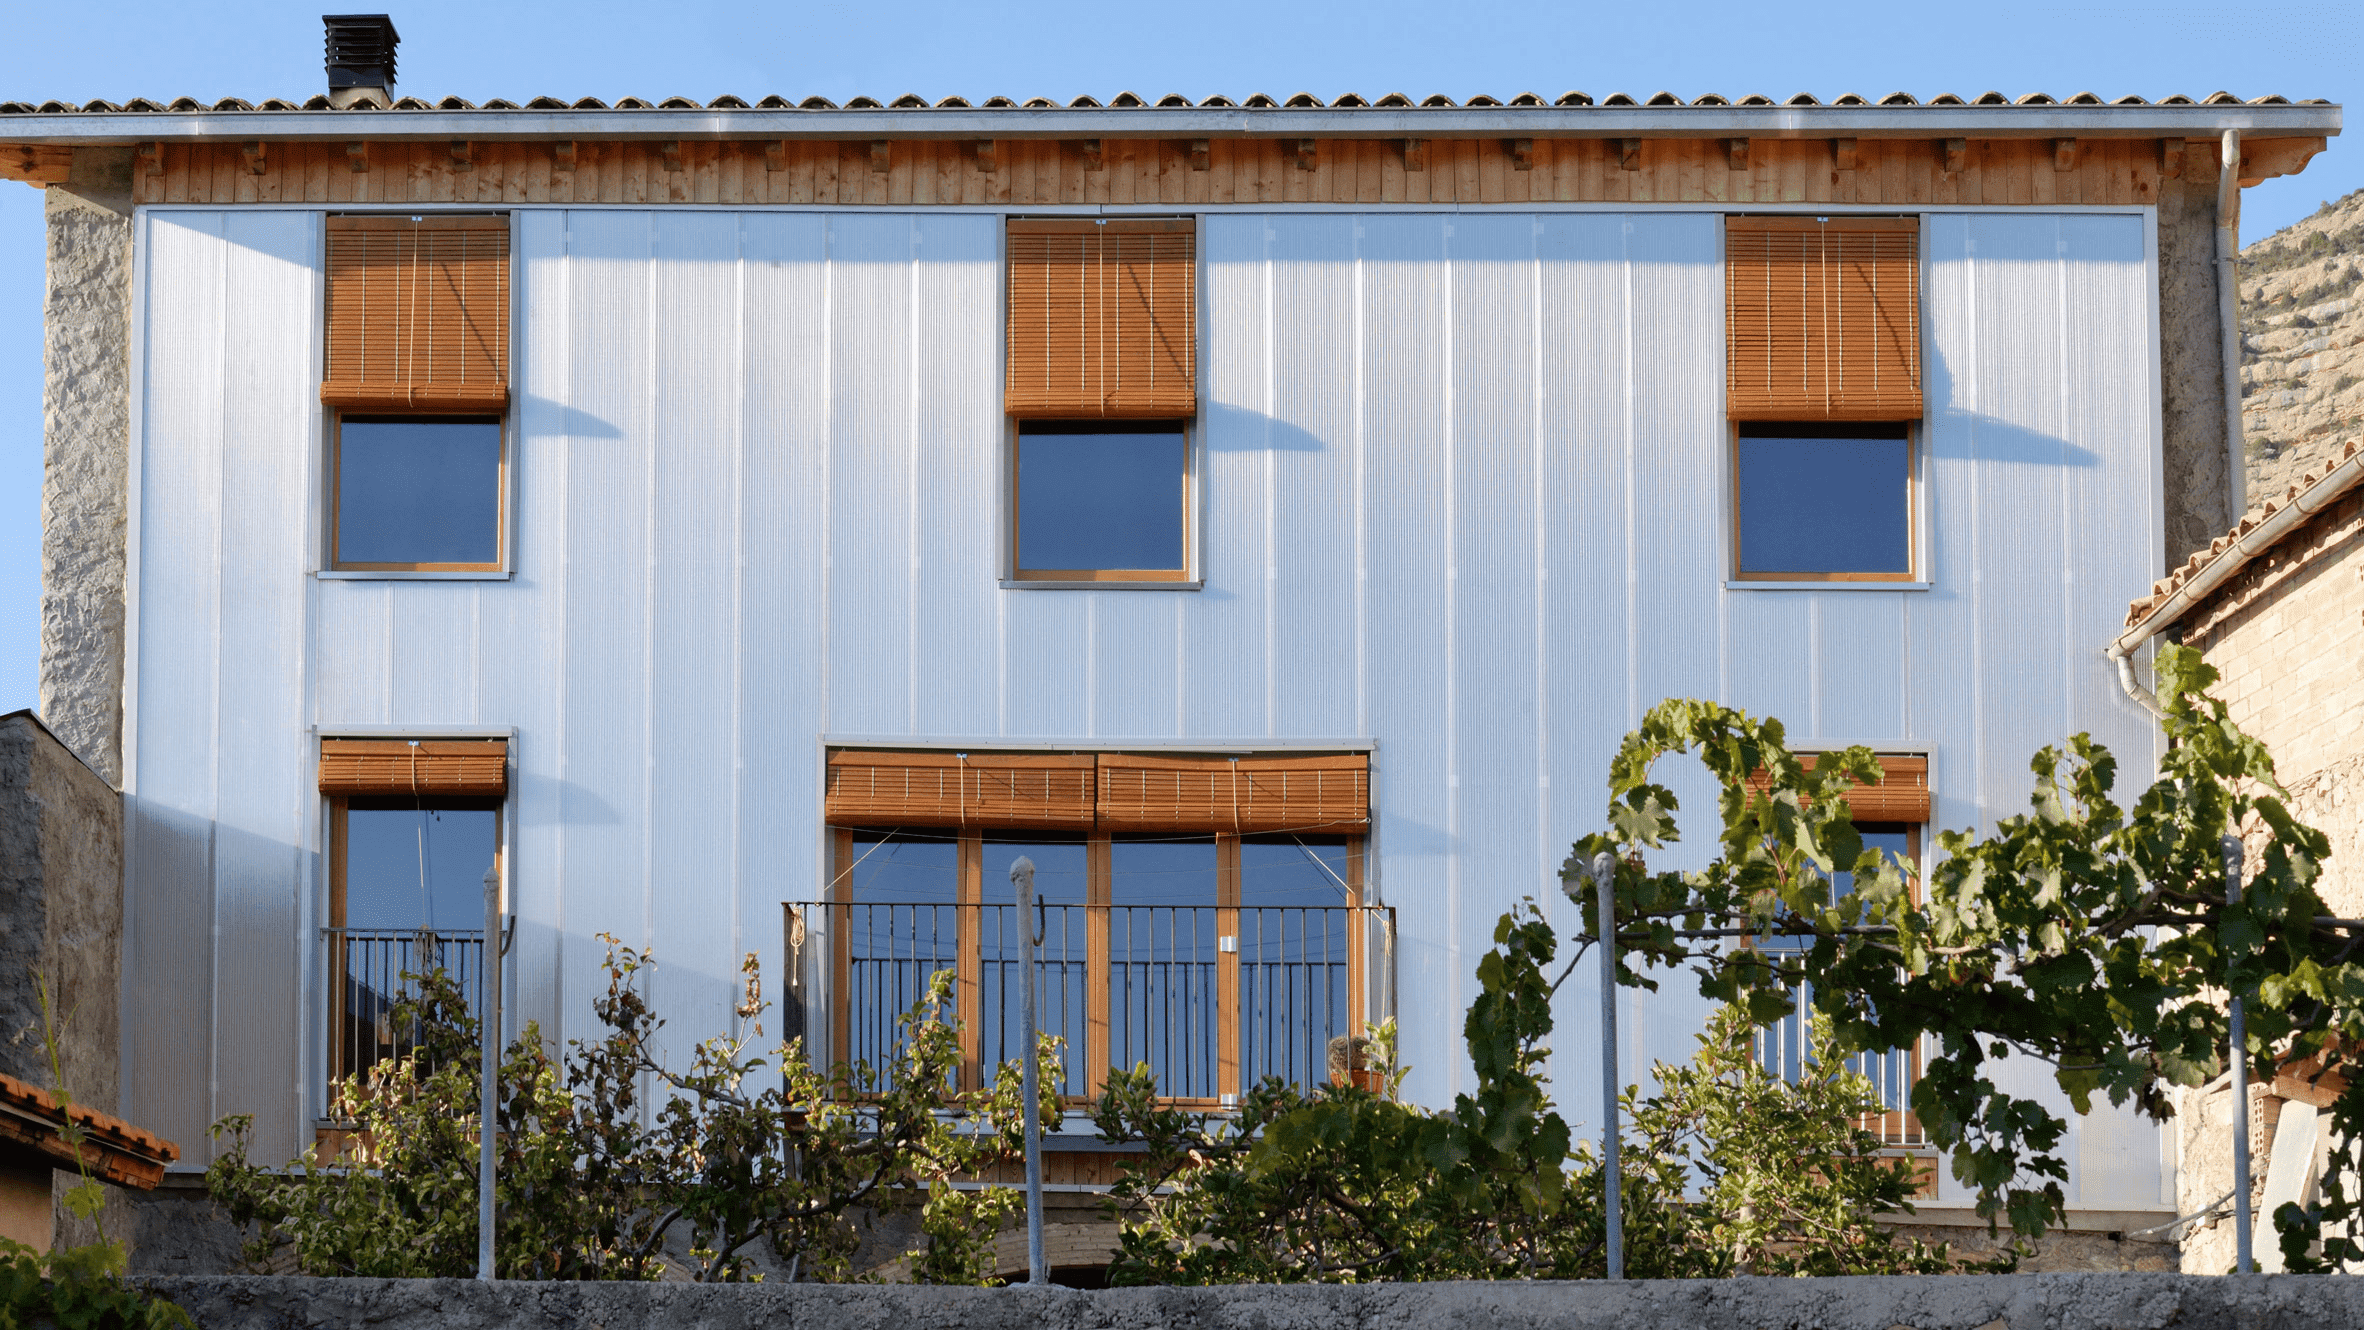
4. Although the other examples on this list have used
polycarbonate
sheeting
for its light
transmission properties, Bunyesc Arquitectes have used layered polycarbonate
sheeting
here to
update the façade of an old Spanish house. The excellent thermal insulation
properties
have been
prized here, used to give the exterior wall a larger thermal mass, allowing the
façade
to slowly
release collected heat during the day when the wall was under direct sunlight.
Then,
during the
colder nights, the heat would slowly release into the home, improving the energy
efficiency of
the home.
bhbadmin
February 12, 2024
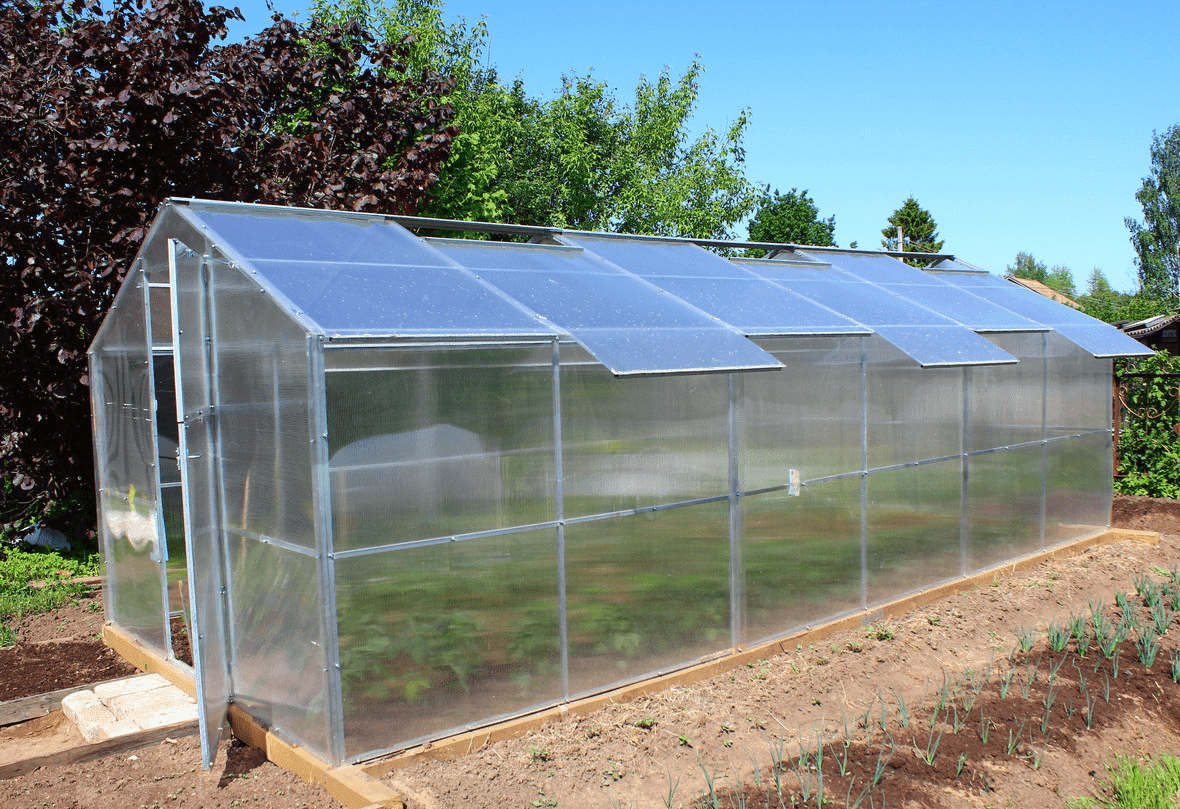
Why Polycarbonate is Perfect for Your Greenhouse
Whether as a small structure in your backyard, or on an industrial scale, polycarbonate sheeting has become a popular glazing material for greenhouses. When building a greenhouse, there are two decisions which the builder will need to be make: the framing material, and the glazing material.
The two most common framing materials are wood and metal, with wood excellent for smaller greenhouses, being a cheaper and easier material to work with. Commercial greenhouses however, will be made with galvanised steel, chosen for the longer life span and minimal maintenance.
However, glazing options are constantly evolving. Whereas glass was used in the past, the high cost, fragility, and poor insulating properties meant it became a less popular material when polycarbonate sheeting became a more common building material.
Polycarbonate sheeting is very lightweight, but durable. This means that it requires less framing materials to support the structure, reducing the cost of the project this way. Polycarbonate also offers both corrugated and flat surfaces, with both options offering interesting ways which greenhouse owners can maximise light penetration into the structure. Corrugated surfaces can optimise sunlight when the sun is at low on the horizon; up to 25% more than a flat surface. Polycarbonate also has excellent thermal insulation properties, and even within our product range, different colours can offer different heat and light transmission. This versatility is incredibility important in creating specific macroclimates, but also microclimates within the greenhouse.
Great for your wallet and great for your plants, give polycarbonate sheeting a go if you’re looking to build a greenhouse!

bhbadmin
October 28, 2024
Holiday Closure Announcement
As the festive season approaches, we would like to inform you in advance of the Bighands Building Supply closure
schedule for Christmas 2024.